Tuesday, September 30, 2014

Life!

For the last week or more now I have been working on a few new Patterns (4 to be exact). I have been so busy trying to finish up these patterns I am so close to finishing I can see it lol. But in the mist of all this I found a hat stored away and since it was really chilly when the kids left for school this morning I let Keegan wear it. He is my boys boy, he loves skulls and zombies so I thought he would like the hat.
This is one of those things I made and never wrote the pattern down, but I think the skull pattern is somewhere on my pinterest. Its amazing the things you may forget about!

Keep an eye out for some new releases! I have all kinds of things planed and cant wait to share <3

Friday, September 19, 2014

Free Flower Coaster Pattern!

I thought It was time to write up this flower I made! I use it for a coaster, even the simple things should be cute right? I have to do some more colors for spring time. I really should be making Halloween one's, maybe one in the near future.


Flower Coaster Pattern
flower coster8.jpg
Materials needed:
size H hook
sewing needle
a ball of cotton yarn
scissors


Stitches used:
Magic Circle
sc: single crochet
dc: double crochet
slst: slip stitch


Special Notes:
Join: ALWAYS join to first st made in the round unless stated other wise.
Starting stitch is ALWAYS worked in the same space as join.

CAM03324.jpg

Rnd 1. Magic circle, ch 2, 20 dc in circle. Pull tight (not too tight so it will bunch up) Join.


CAM03325.jpg

Rnd 2. ch 4 (counts as sc and ch 3 space), sk 2 st sc in next, [ch 3, sk 2 st and sc in next] repeat 4 more times. ch 3, join to first ch made.


CAM03327.jpg

Rnd 3. [ch 2, dc, ch 3, 2 dc] in same ch 3 sp. [2 dc, ch 3, 2 dc] in each of the ch 3 sp. join.


flower coster5.jpg

Rnd 4. ch 2, 6 dc in same ch 3 sp, sk 2 dc and sc in space. [7 dc in ch 3 sp, sk 2 dc and sc in sp] repeat around. Join. Fasten off.


Stretchy Boot Cuff Pattern (Free) Adult Sm, Med, Lg Sizes


I am still ALIVE!! LOL. Really tho, I have been so busy for these last few weeks I haven’t really had a chance to crochet and quite frankly I miss it. With the winter months approaching I have A LOT of work to do and I don't know when I will find time. I have been trying to kick this illness that has struck me for the last week.. I am now just a cougher (I swear I should have great abs by the time I kick it for good). It took me a good couple of days to construct this pattern and write it. I was struggling to finish this one with how awful I was feeling. But I got it finished with 3 different sizes. This pattern has not been tested so if there are flaws please let me know and I will fix them :) remember Share this free pattern with others and link back to my blog! Thanks for looking and ENJOY! (the link below is to the pattern on my drive, easier printing)

Stretchy Boot Cuff Pattern
(Adult sizes, small, medium, large)


bootcuffs.jpg.jpg


Materials used:
size H hook
needle (for tieing in ends)
worsted weight yarn


Stitches used
sc: single crochet
dc: double crochet


Special notes:
Join: always join to first STITCH not the ch in each round.


Rnd 1. ch (42,44,46), join to form a circle *careful not to twist the chain*


Rnd 2. Ch 1, sc in same sp as join, sc in each ch sp. Join. (42,44,46)


Rnd 3. Ch 2, dc in same sp as ch 2, [sk 1 sp, 2 dc in next] repeat around. Join. sl st to space between groups of 2 dc.


Rnd 4-10. Ch 2, dc in same sp as ch 2, [sk dc group, 2 dc in sp] repeat around. join.


Rnd 11. ch 1, sc in each dc. Change color and join.
Rnd 12. ch 1, hdc in same sp as join and every st throughout. Join.


Rnd 13-16. ch 2, [fpdc in first st, bpdc in next] repeat around. Join.


Rnd 17. Ch 1, [fphdc around fpdc, bphdc around bpdc] repeat around. Join and fasten off.


Bottom of boot cuff
Rnd 1. Join to any ch sp on opposite side that you were previously working on (bottom of boot cuff/starting ch), ch 1, sc in same sp as ch 1 and throughout each ch sp, join.


Rnd 2. Ch 1, [fphdc in first st, bphdc in next] repeat around. Join.


Rnd 3. ch 1, [fphdc around fphdc, bphdc around bphdc] repeat around. Join. fasten off.


bootcuffs2.jpg

Tuesday, September 2, 2014

FREE Frankenstein Hat Pattern Child/Teen size!

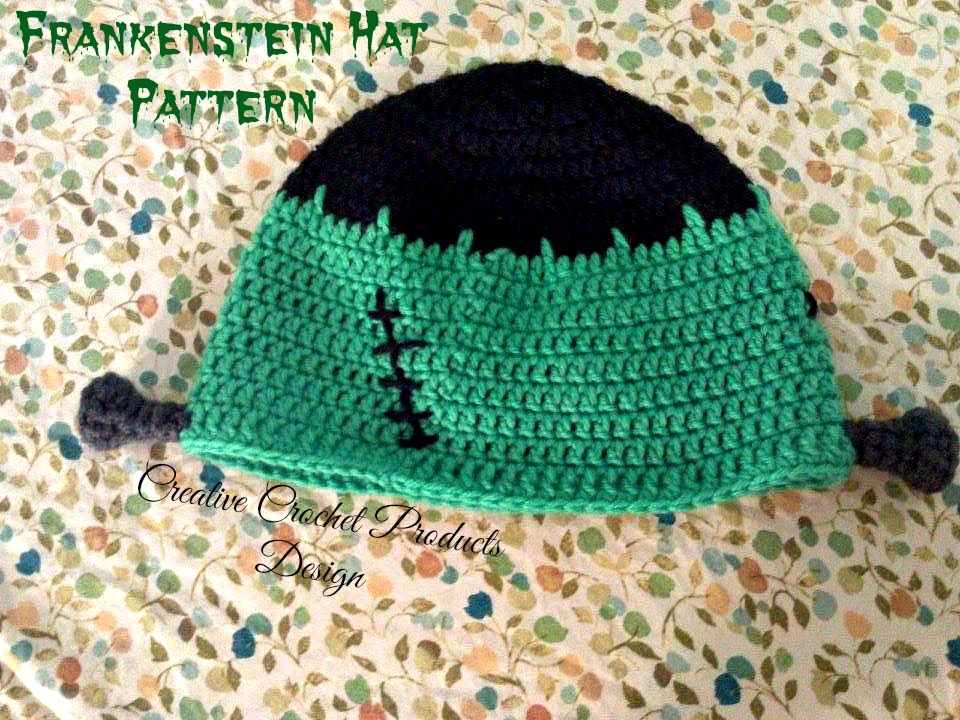
Free Frankenstein Hat pattern!! 
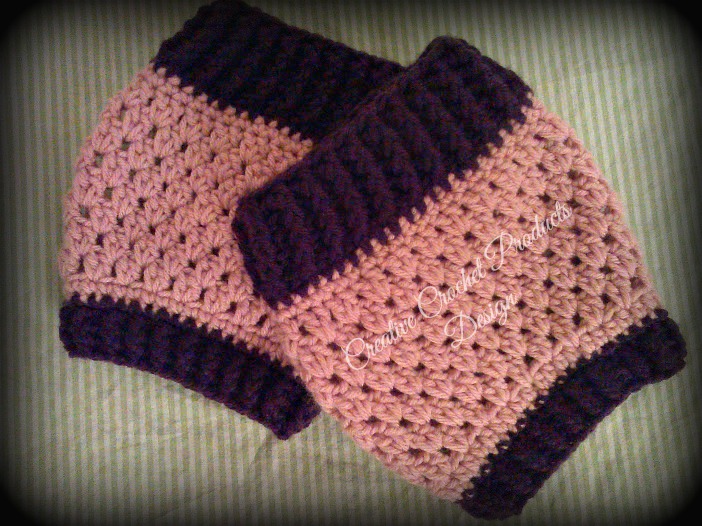
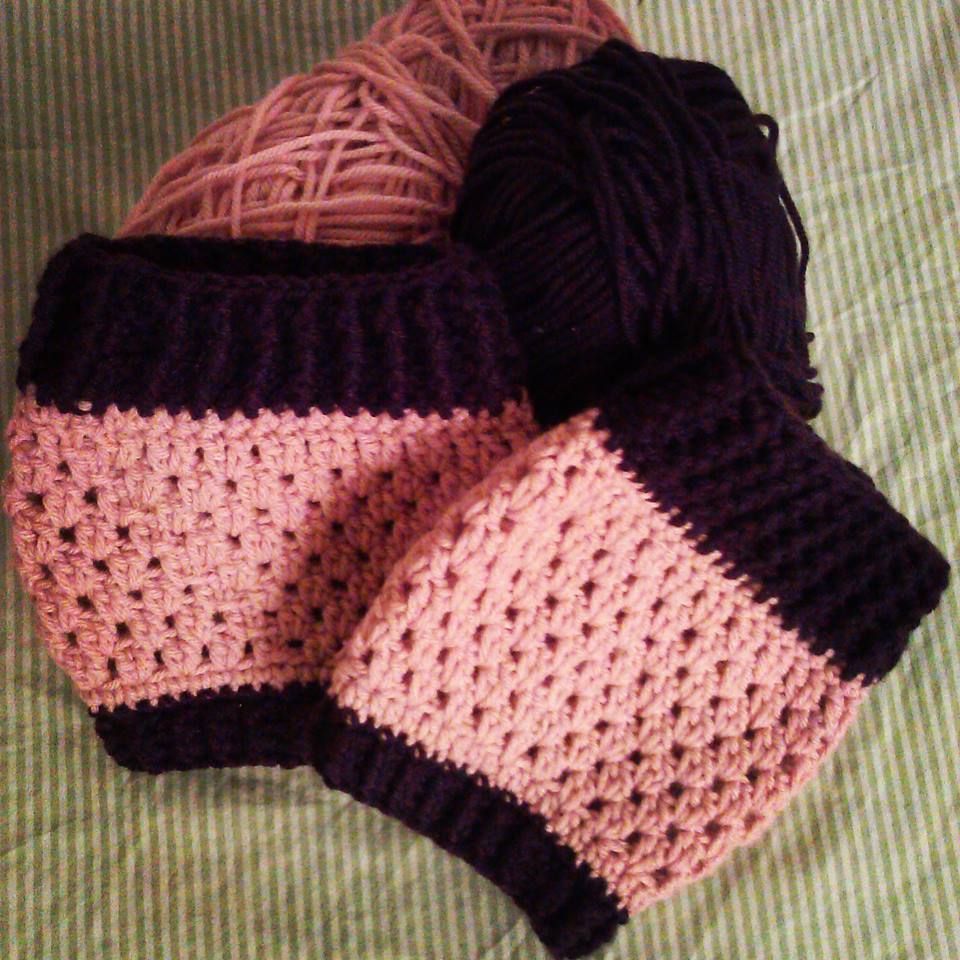
I know I cant be the only one gearing up for Halloween right?!?! I love the idea of all the little cute monsters running around, so I thought I would pull together this cute hat. I have not had time to work up baby sizes yet but hoping to do so soon! I have a list of things I need to do including putting up and adult pair of my "walking of clouds" booties. Any way.... Here are a few pictures that I have of the hat! I didn't take progress pictures this time. Be sure to share this pattern with others, sharing is caring ;) 
same pattern below


frankenstein  hat
(child/teen size)
fsh2 edit.jpgfsh3 edit .jpg

Materials:
G hook (4.25) for hat
1 ball of green yarn (worsted weight)
1 ball of black yarn (worsted weight)
white yarn (worsted weight)
Needle for sewing in ends
scissors

Stitches used:
Magic Circle
dc: double crochet
hdc: half double crochet
sc: single crochet
dtr spike: double treble crochet spike stitch (click for example if your not familiar with the spike stitch
sp: space
st: stitch
ch: chain

Special notes! PLEASE READ!
Always join to first stitch made in that round unless told otherwise.
Always work first stitch in each round in the same space as join.

Base of hat
Rnd 1. Magic circle, ch 2, 10 dc in circle. Pull tight. Join to first dc made. Ch 2 (10)

Rnd 2. 2 dc in first stitch and 2 dc in each stitch around. Join. ch 2 (20)

Rnd 3. 2 dc in first stitch, 1 dc in next (2 dc in same st, 1 dc in next) repeat all the way around. Join, ch 2 (30)

Rnd 4.  2 dc in same sp, 1 dc in next 2, (2 dc in same sp, 1 dc in next 2) repeat around. Join, ch 2 (40)

Rnd 5. 2 dc in same sp, 1 dc in next 3, (2 dc in same sp, 1 dc in next 3) repeat around. Join, ch 2 (50)
Rnd 6. 2 dc in same sp, 1 dc in next 4, (2 dc in same sp, 1 dc in next 4) repeat around. Join, ch 2 (60)

Rnd 7. 2 dc in same sp, 1 sc in next 5, (2 dc in same sp, 1 dc in next 5) repeat around. Join, ch 2 (70) (go to Rnd 10 for CHILD SIZE)

Rnd 8. 2 dc in same sp, 1 dc in next 6, (2 dc in same sp, 1 dc in next 6) repeat around. Join, ch 2 (80) (TEEN SIZE)

Rnd 9. dc in same sp and each sp around. Join, ch 1(70, 80)

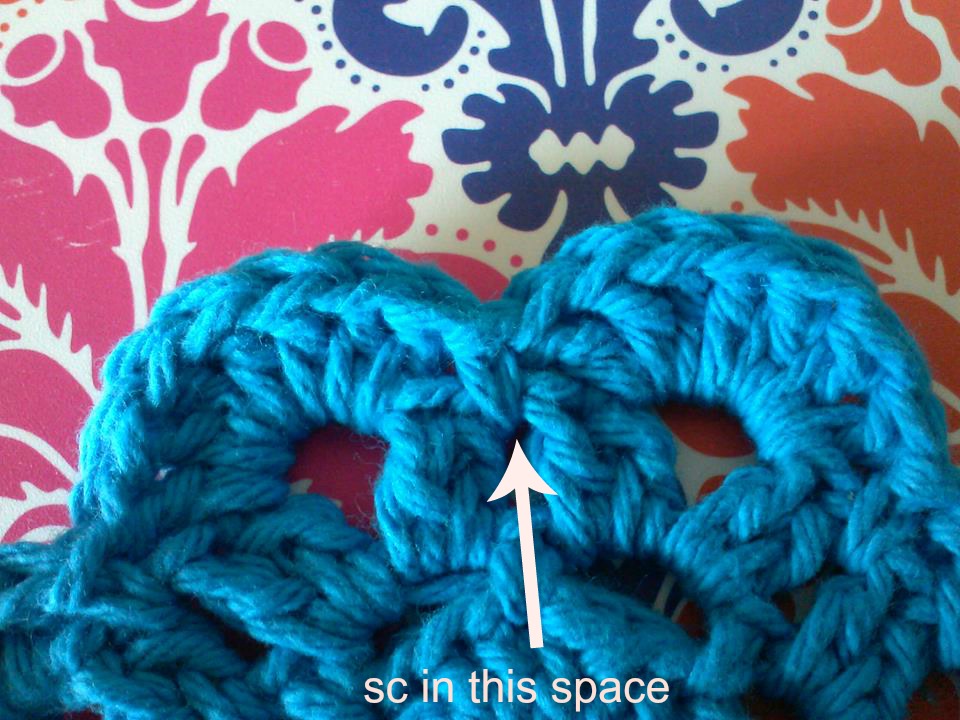
Rnd 10. hdc in same sp and next 2, (ch 1, skip st hdc in next 4) repeat around. Change color to green. Join. ch 2.

Rdn 11. dc in same sp and next 2, dtr (spike) in missed stitch, (dc in next 4 sp, dtr spike in missed stitch from previous round) repeat all the way around. Join, ch 2 (70,80)

Rnd 12-(17,18). dc in each st around. Join, *ch 2 (*till last round 17,18 then ch 1*)

Rnd 18,19. sc in same sp and each around. Join. Fasten off.


Eyes:
Rnd 1. Magic circle, ch 1, (hdc, 2 sc, hdc, 3 dc) 2 times in circle, pull tight. Join to first st. ch 1

Rnd 2. sc in same sp, sc in next 3 sp, (2 sc in next 3, sc in next 4 sp) repeat around. Join. fasten off.

Center of eye:
You can use a button or..
Magic Circle, ch 1 6 sc in circle, pull tight. Join to first sc.
Attach to white eye

Screws:
Rnd 1. Magic circle, ch 1, 6 sc in circle, pull tight. join. ch 1
Rnd 2. 2 sc in each st, join. ch 1
Rnd 3. (Back Loop Only for this rnd) sc in each st. Join. ch 1.
Rnd 4. *sc2tog all the way around.
Rnd 5-7. sc in each st around.
fasten off.

assemble the way you would like. Sew on mouth and stitches to your hat any way you would like. I made my hat a smile :)